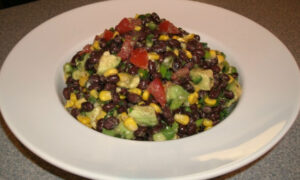
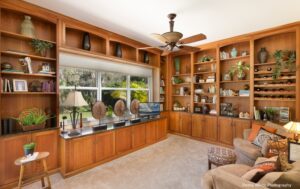
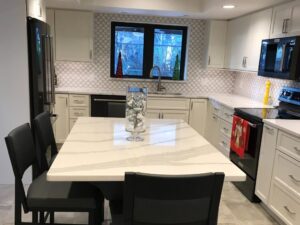
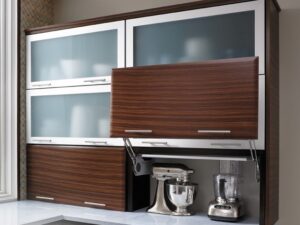
Bo Peep’s Revenge: Braised Lamb Shank Minestra

Bo Peep’s Revenge: Braised Lamb Shank Minestra

I hate coffee (I know, it’s me and three other people over the age of 12 in the United States). Actually, I don’t have anything against coffee; I just don’t care for it. I also don’t like licorice or bell peppers. I’ve learned to work around all three when I am eating someone else’s cooking. I don’t make a big deal out of it, but I pass on coffee with dessert, and I always leave the green pepper chunks discreetly on my plate.

Everyone has something that they don’t care to eat. I use to ask people coming over for dinner “what do you like?” They invariably said, “Oh, I’ll eat anything,” and I end up making the one thing they absolutely detest. So now I ask, “What do you hate?” – and they tell me. It makes preparing a menu much easier, believe me.

We used to have a friend (who is no longer in the picture) that had this absolutely childish aversion to seafood. Wouldn’t eat it; wouldn’t consider eating it; and made unnecessary comments if someone else was eating it. In fact, his wife told me she had to throw out the Worcestershire sauce after he found out it contained anchovies. Like I said, a completely immature attitude about it.

I try to be attentive when someone tells me they don’t care for something. I would much rather alter my menu plans than intentionally serve someone something they don’t like. Same goes for people with allergies, people with moral aversion to eating meat, diabetics, and such. But sometimes you just need to secretly tweak someone who makes a big deal out of hating a particular food.

I can admit this now: After his wife told me about the Worcestershire sauce, I used to sneak anchovy paste into anything I could when I cooked for this friend. I know – it’s mean. No one else knew about it at the time, just me. It was my own little secret revenge because he was such a big baby about it. I would snicker every time he would rave about the macaroni and cheese (by the way, anchovy paste is an AWSOME addition to cheese sauce! I still use it when I make mac and cheese). It didn’t hurt him, and it made me feel a little better about having to put up with his grousing.

Do I feel guilty about the anchovy paste? I used to, just a tiny little bit – then my guilt was lifted. I told you that he wasn’t in the picture any more. That’s because he and his wife went through a rather ugly divorce – one where someone was definitely at fault. Needless to say, my newly single friend was distraught, and I was trying to comfort her so I decided to tell her about my secret little revenge. I’ve never seen someone turn from tears to laughter so fast in my life.

It just goes to show you: a little revenge is good for the soul. Think about what Bo Peep would have done to those wayward sheep once she got her hands on them.

Which leads me (although rather awkwardly) to this dish. I’ve mentioned my love for lamb before, but lamb isn’t the healthiest selection of meats. Because of that, we eat it rather sparingly around our house. Luckily, with Passover around the corner, lamb shanks were on sale. (I’m very ecumenical when it comes to bargains.) I also had 4 different kinds of greens in my CSA haul that I was trying to figure out how to use. I like lamb and cannellini beans, and I like beans with greens, so I just decided to throw everything together. It simmers for a couple of hours, so it’s low maintenance, and the lamb imparts so much flavor to everything else that it tastes much more upscale than it’s peasanty origins.

I used canned beans for this because I could not find dried cannellini beans anywhere. Of course, I could have used dried navy or great northerns, but I like the creamy texture of the bigger cannellinis. If you choose to use dried beans, just soak them overnight and add them at the beginning of the braising. You’ll probably have to go back and add some additional water as well.

At the last minute, I decided to throw a little acid in the pot. Boy, did it make a difference! Just a tablespoon of red wine vinegar really highlighted the robust flavors of the lamb and cut through some of the creaminess of the beans. Besides, vinegar’s always good on greens.

And I have to say that I’m torn – leaving the shanks whole makes a much nicer presentation, but stripping the meat and throwing it back in the pot makes it much easier to serve. Do whichever you want.

But the next time someone frustrates you with their unnecessary dietary demands, find a way to exact a little harmless, culinary revenge. It does wonders for your mood.

Braised Lamb Shank Minestra

Scott Duncan, ©2017
Hearty beans and greens accent earthy lamb shanks for a great family meal.
Prep Time 25 mins
Cook Time 2 hrs
Total Time 2 hrs 25 mins
Course Entree
Cuisine Italian

Ingredients
  

  • 2 lamb shanks about 1 lb. each
  • 4 T olive oil
  • 1 onion chopped
  • 1 carrot diced
  • 4 cloves garlic chopped
  • Pinch red pepper flakes
  • 1 T finely chopped fresh rosemary
  • 3-4 sprigs of fresh thyme
  • 1 bay leaf
  • 3-4 C water
  • 2 15 oz. cans of cannellini beans drained and rinsed
  • 1 lb hearty greens cleaned and chopped
  • 1 T red wine vinegar
  • Extra virgin olive oil optional
  • Grated parmesan cheese optional

Instructions
 

  • Preheat large Dutch oven over medium high heat.
  • Salt and pepper lamb shanks to taste.
  • Add 4 T olive oil to Dutch oven and sear lamb shanks 5-6 minutes per side until browned.
  • Add onion and carrots.
  • Sauté 5-6 minutes, until onions are translucent.
  • Add garlic, red pepper flakes, salt & pepper to taste.
  • Sauté 1-2 minutes. Add enough water to cover ¾ of the lamb shanks.
  • Add bay leaf, rosemary, and thyme sprigs.
  • Bring to boil, cover, and reduce to simmer.
  • Simmer for 1 ½ - 2 hours.
  • Remove lamb shanks and reserve.
  • Remove thyme stems and bay leaf, then discard.
  • Add cannellini beans and bring to boil.
  • Stir in greens and cook until wilted.
  • Adjust seasoning as desired.
  • Remove from heat and add red wine vinegar.
  • Return meat to the pot to serve.
  • Top with extra virgin olive oil and parmesan cheese, if desired.

Notes

Note: Removing lamb from the bone before returning to pot will make for easier serving.

This post is reblogged from my earlier site, Inexpensive Eating

Hearty and Healthy: Butternut Squash Soup

Hearty and Healthy: Butternut Squash Soup

OK, I will be the first one to admit that this recipe is not going to win any awards for originality or creativity, but it’s good. Really good. And simple. AND healthy. How often do you get to say all of that about one dish?

I must have some addiction to carotene because I love most orange hued vegetables: carrots, sweet potatoes and canned pumpkin are in my fridge and pantry year round. In fact, pumpkin is one of the few items I buy canned and find it just as good. Unfortunately, that same idea does not translate to other squashes.

Acorn, spaghetti, and butternut squashes only seem really tasty in the cooler months. I’ve tried frozen and canned but don’t care for either. You can also find squash all through the spring and summer, but like most produce, they definitely lack something when harvested out of season. For that reason, I try to make the best use of them while I can get them.

This soup of a great, weeknight meal. One pot, items I already have on hand, 45 minutes, pair it with some bread, and you’re done. I use chicken stock when I prepare it, but swap that out for vegetable stock and you have a vegan dish that satisfies everyone.

One of the pieces of kitchen equipment that I cannot live without anymore is my immersion blender. I use it constantly, and it is perfect to make this into a smooth, velvety soup that seems quite elegant. If you do not have an immersion blender, go buy one. But until then, you can work in batches and cream this soup in a blender – no one will be any the wiser.

The real trick to slightly sweet soups like this is to balance it with some acid. It changes everything. The best acid to use for orange vegetables? Cider vinegar, of course. If you don’t believe me, sample it without the vinegar and then add it. You will be amazed at the difference. But too much can be as bad as not enough, so be careful.

So if you’re looking for inventive, haute cuisine, you will have to keep looking. But if you are looking for hearty, simple, and fantastic – you’ve come to the right place.


Butternut Squash Soup

Scott Duncan, ©2016
Not fancy, but fantastic. Not stylish but simple to make. For omnivores and vegans alike. Perfect for a light weeknight meal.
Prep Time 10 mins
Cook Time 45 mins
Total Time 55 mins
Course Soup
Servings 4 -6 servings

Ingredients
  

  • 3 T Olive Oil
  • 1 large onion diced
  • 2 celery stalks diced
  • Pinch of red pepper flakes
  • 1 large butternut squash 2 ½ - 3 lbs, peeled, seeded, and diced
  • 2 bay leaves
  • 1/8 t ground cinnamon
  • 4 C chicken stock
  • 2 T cider vinegar
  • Salt & Pepper to taste

Instructions
 

  • Preheat a large soup pot over medium high heat.
  • Add olive oil, celery, red pepper flakes, pinch each of salt & pepper.
  • Sauté until onions are translucent.
  • Add butternut squash, bay leaves, cinnamon, chicken stock, and another pinch of salt & pepper.
  • Bring to a simmer, cover, and let cook for 40 minutes.
  • Once the soup is cooked, remove bay leaves.
  • Blend until smooth using an immersion blender. Alternatively, puree soup in a blender, working in batches.
  • When soup is smooth, stir in cider vinegar and adjust seasonings to taste.

Notes

Optional: for a silkier (and more decadent) soup, stir in ½ C heavy cream at the end. Garnish with fresh dill, if desired.


A Quick Dinner Between Stops: Tomato, Asparagus, & Pesto Salad with Chicken

A Quick Dinner Between Stops: Tomato, Asparagus, & Pesto Salad with Chicken

It pays to plan ahead. I get mocked for it all the time, but I don’t care. Last weekend I spent the afternoon making pesto out of the abundance of basil that is all over the place this time of year. It’s quick, simple, fragrant, and delicious. Just 5 ingredients: basil, garlic, toasted nuts, parmesan cheese, and olive oil. I make it in the food processor, package it in handy-size containers, and stow it in the freezer for later. It’s amazing how often prepared pesto can get me out of a weeknight jam when there is only 20 minutes to make dinner before I have to run out the door for a client appointment, board meeting, or what have you.

All these veggies pair nicely with pesto on their own, so I thought I might as well toss them all together. Same goes for the chicken. I seasoned the chicken breasts with just simple salt and pepper, instead of doing anything that would compete with the pesto.

In an effort to add a little body to the sauce (which is really just pesto), I cook the orzo as I would a grain – a 2:1 ratio of liquid to orzo (when it’s finished cooking, it looks like a pot of rice). That way I can use all the starchy goodness that comes from the pasta when it cooks to give the sauce a little more heft. Cooking it in chicken stock just imparts that much more flavor. The only thing the recipe lacks is some crusty bread to go with it (which I happened to have on hand).

I know this is short, but that’s all the time I have – I’m running back out the door.

Tomato, Asparagus, & Pesto Salad with Chicken

Scott Duncan, ©2015
A healthy and great-tasting dinner you can have on the table in 20 minutes. Prepared pesto saves the day again.
Prep Time 5 mins
Cook Time 15 mins
Total Time 20 mins
Course Entree
Cuisine Italian
Servings 4

Ingredients
  

  • 2 boneless chicken breast halves
  • 2 T olive oil divided
  • 1 C orzo
  • 2 C chicken stock
  • 1 pint grape tomatoes halved
  • 1 lb asparagus trimmed and cut into 2” pieces
  • ½ C frozen corn thawed
  • ¼ C prepared pesto
  • Salt & pepper to taste

Instructions
 

  • In a medium saucepan over medium heat, add chicken stock, orzo, and salt & pepper to taste.
  • Simmer until al dente, stirring occasionally. Most of the liquid will be absorbed by the orzo.
  • While orzo is simmering, preheat skillet over medium high heat.
  • Season chicken breasts with salt & pepper.
  • Add 1 T olive oil to skillet and sauté chicken 6-8 minutes per side.
  • Remove from pan and allow to rest for 5 minutes before cutting.
  • As chicken rests, add remaining olive oil to same pan and sauté asparagus for 4-5 minutes.
  • In a large mixing bowl, combine grape tomatoes, corn, pesto, asparagus, and orzo (with remaining chicken stock).
  • Toss to combine and check seasonings.
  • Slice chicken and serve atop orzo salad.


This post is reblogged from my earlier site, Inexpensive Eating

Look At Me: 4 Easy Focal Points for Your Kitchen

Look At Me: 4 Easy Focal Points for Your Kitchen

It’s a question I ask early in the selection process: what do you want people to notice first when they walk into your kitchen? There is really no wrong answer, just a matter of personal preference. I’ve used backsplash material to concentrate a person’s gaze, counters, pieces of art, even nothing at all. Here are a few examples of the most common focal points to create for your kitchen:

1. Backsplash

Probably the most common focal point created. A little splurge on eye-catching tile can be just the thing to set off a room,

Glass Tiles in Watery Blues Bring the Ocean Indoors

Glass tiles in watery blues bring the ocean indoors

but nothing says the backsplash has to be made out of tile either.

Granite Backsplash Creates Drama without Overshadowing

Granite backsplash creates drama without overshadowing

2. Countertop

Usually done with natural stone that has a little bit of oomph.

Bold Movement in Granite Counters Become a Natural Attention Grabber

Bold movement in granite counters becomes a natural attention grabber


Of course, there are exceptions to every rule.

 Primary Color Countertop

Primary color countertops seize your gaze

3. Architectural Detail

This can allow you to work around a unique element of your existing room.

Arched doorway draws your attention

Arched doorway draws your attention

But you can also create an architectural detail specifically to become the highlight of your kitchen.

Create an architectural detail worth looking at

Create an architectural detail worth looking at

4. Negative Space

Sometimes intentionally leaving some space unused allows a client to put their personal twist on things.

Bold Colors Draw Paint draws attention to negative space created by high ceilings

Bold paint colors draws attention to negative space created by high ceilings

Even in a small kitchen, negative space can often be used as storage at the same time.

Negative space doubles as both storage and display space for Fiestaware

Negative space doubles as both storage and display space for Fiestaware

If you don’t have a kitchen focal point worth looking at, we can help you. Contact us to get started. We’d love to hear from you.


Be Prepared: Pan Seared Salmon with Orange Dill Reduction

Be Prepared: Pan Seared Salmon with Orange Dill Reduction

I always enjoy salmon, but I can get into kind of a rut with it. I seem to prepare it the same 2 or 3 ways, time after time. Recently I decided to shake it up – just a little bit.

Over the years I have come to realize that some of my most creative cooking ideas have come from just standing in front of the open refrigerator (thank goodness Mom can’t read this) and playing with whatever ingredients I have on-hand. I wish I could say that this dish took time to contemplate, compare and contrast various flavor profiles to come up with the perfect combination, but no. This arose strictly from being too lazy to run to the store and pick up anything else.

And I cannot stress this enough: a well-stocked pantry can save almost any dinner situation. My friends mock me for the variety of items I consider ‘staples’. Most people stop at flour, sugar, and butter. I also keep 3 kinds of rice, quinoa, barley, cornmeal, sundried tomatoes, olives, pumpkin, 6 kinds of vinegars, 3 kinds of mustard, …well, you get the picture. And if you don’t have enough space to store all of these ingredients, then I also happen to know a great kitchen designer who can solve that problem for you. Some simple storage accessories will work wonders for your pantry!

The best part – this dish is incredibly easy and takes about 15 minutes to put together. Seriously, the vegetables took longer to cook than the salmon did. Of course, we like out salmon medium to medium-rare. If you like yours more well-done, you might take 20 minutes instead.

So consider adding to your pantry list, it’s always handy to be prepared.

Pan Seared Salmon with Orange Dill Reduction

Scott Duncan, ©2015
A quick and easy weeknight meal that looks like it took a lot of effort. Want to impress your family and friends? Then make this dish.
Prep Time 5 mins
Cook Time 10 mins
Total Time 15 mins
Course Entree
Cuisine Easy, Seafood
Servings 4

Ingredients
  

  • 2 T olive oil
  • 4 salmon filets 4-6 oz. each
  • Juice of 1 orange approx. ½ C
  • 2 T chopped fresh dill
  • 2 scallions chopped
  • ¼ C sour cream
  • 1 t white wine vinegar
  • Salt and pepper to taste

Instructions
 

  • Preheat 10" non-stick sauté pan over medium-high heat.
  • Salt and pepper salmon filets.
  • Add olive oil to preheated pan and add salmon filets, flesh-side down.
  • Sear for 3 minutes, flip, and sauté for 3-4 more minutes.
  • Remove salmon from pan and cover with foil.
  • Reduce heat to medium.
  • Add orange juice, dill, and scallions.
  • Reduce orange juice by half (3-4 minutes).
  • Stir in sour cream and white wine vinegar.
  • Remove from heat.
  • Salt and pepper to taste.
  • So serve, spoon 1-2 tablespoons of orange reduction over each salmon filet.
  • Garnish with sprig of fresh dill, if desired.


A Cook’s Kitchen

A Cook’s Kitchen

I always enjoy working with clients who have a passion for cooking. It’s fun to talk about not only appropriate storage needs and aesthetic desires, but also the virtues of various olive oils, cookware, and techniques. This particular project also had an additional perk – it was challenging. You see, we wanted to create a cook’s kitchen in a small condo at Mt. Vernon.

Inspriation Piece

Inspiration Piece

The Inspiration

The client wanted what I believe at the time was described as ‘Transitional Tuscan’. She had found a print styled to look like a postcard, depicting an various stages of olive oil that became the color palette, but she wanted none of the weathering or detailing that is normally associated with a Tuscan look.

The Challenge

I’ve designed many small kitchens in condos, but creating a cook’s kitchen in a small space is often like trying to get 10 lbs. of flour to fit into a 5 lb. bag, something is going to spill over. Built-in appliances were a given – the ergonomic and mechanical functionality they can bring is essential for a serious cook; a full-size refrigerator was also necessary; and a coffee bar/serving area adjacent to the dining room was also on the list of must-haves. One saving grace for me – this client wanted to keep some formality for her dining area, and therefore wanted the kitchen to stay a separate room. Why is that good? Because I didn’t have to eliminate walls to open up the space like I did for this Mt Vernon renovation. More walls means more flexibility in the kitchen design.

Cook's Kitchen.Before 1     Cook's Kitchen.Before 2     Cook's Kitchen.Before 3     Cook's Kitchen.Before 4

To make matters more interesting, the kitchen also doubled as a laundry room with no defined area for a washer or dryer (notice the ‘BEFORE’ photo, click to enlarge). There was no place else to locate these appliances so they had to stay in the kitchen – but be inconspicuous.

The Results

Transitional Tuscan 4

A galley kitchen, with everything a serious cook can desire.

A galley kitchen with plenty of room to create is exactly what the client wanted. By grouping the big appliances together, it actually maximizes the visual space. Stacked washer and dryer were hidden by an extra-deep oven cabinet and refrigerator alcove. Deep drawers were used almost everywhere to accommodate her various cooking vessels, and roll out trays were added under the cooktop for pots & pans. The coffee bar/serving area was created by stealing space from an underutilized hall closet. Trash is convenient but concealed next to the sink, and indirect cove lighting is paired with LED under-cabinet lighting to satisfy the homeowner’s ‘no can lights’ edict.

Transitional Tuscan 2

Deep appliance cabinets help conceal the washer & dryer at the end of the kitchen

Choosing the Simplicity door style from our private Stressless Collection of cabinetry allowed the homeowner to maximize her budget without giving up the essential details and accessories she wanted. The Almond Butter painted finish warms up the cabinetry just a little to keep with the Tuscan colors. Paired with Coast Green granite (sealed with a 15-year dry coat process for less maintenance), stainless steel appliances, and black handles, the cabinetry contrasts nicely with each element. Rounding out the finishes are matching floor and backsplash porcelain tile which resembles sandstone adds a rustic touch that nods towards the Tuscan.

All in all, I’d say they were happy: I went home with 2 bottles of gourmet vinegars and two of the best olive oils I’ve ever tasted. As I said, I enjoy working with clients who have a passion for cooking.

Transitional Tuscan 1

The warmth of Tuscan colors with transitional simplicity

Cabinetry: Stressless Collection
Doorstyle: Simplicity
Wood Specie: Maple
Finish: Almond Butter
Countertops: Coast Green granite
Remodeling Partners: Fred H. Bey, Inc.; Rice’s Appliances

Transitional Tuscan 3

Dual purpose: coffee bar & serving area

If you’re kitchen layout leaves you uninspired, we can help. Leave the worrying to us. Contact us today to get started.


Stolen Inspiration: Chipotle Poached Shrimp Tacos

Stolen Inspiration: Chipotle Poached Shrimp Tacos

I find that inspiration for new dishes comes from a multitude of sources: childhood memories, fantastic restaurant meals, conversation with friends, bizarre dreams (yes, it’s true – I do dream about cooking from time to time), etc. But I think the most often used source of inspiration comes from the plethora of cooking and travel shows with which I seem to fill my television-viewing time.

The local PBS station has added an additional HD channel to its line-up called Create. It’s full of familiar PBS programs that show you how to build, garden, paint, sew, travel, and cook. The travel hosts are these intrepid globe trekkers hopping from country to country, showing us not only the history, art, and architecture of each place, but also the unique cuisine of the region (always makes me alternate from cringing to salivating as I see what they eat). One recent afternoon, sandwiched between trips to London and Paris, was a repeat of America’s Test Kitchen, which was tackling Mexican food. Don and I both stopped in our tracks as we watched them work their magic on chicken tacos. They came up with a preparation that I knew I needed to steal pay homage to in a recipe.

OK, I freely admit that I stole the cooking method they presented – but the flavor profile and ingredients are my own. The only ingredient common to both recipes is chipotle in adobo. I’m telling you, this is like no flavor you’ve ever had in a taco. The cooking method poaching the protein in citrus juice, then reduce the juice to create a great sauce to spoon over the tacos. (If tacos aren’t your thing, this would make a great addition to a seasoned rice dish as well.)

The added beauty is that all of the ingredients are staples in my fridge. It’s quick and simple – two adjectives that I can’t apply to many of the recipes I come up with. I chose to use lime juice for my shrimp because it’s the first thing I think of when it comes to Mexican food. The only trick is removing the shrimp before they are cooked all the way through. Since you are adding them back to the reduced sauce at the last minute, you want to make sure the final dish isn’t overcooked (nothing worse than rubbery shrimp, is there?)
I know there are all sorts of theories about not serving dairy products with seafood, so I left it off for the glamour shots, but I certainly loaded the jack cheese and sour cream onto my taco before I ate it.

I also had some fresh ears of corn in the fridge that needed a reason to be cooked. I always think lime pairs well with corn, so I decided to roast the corn along with some scallions and created a simple Lime Corn Salad to go with the shrimp tacos.

The chipotle gives a smoky punch to the shrimp. The natural sweetness that comes out of roasting corn complemented the tacos brilliantly. (I have to say, being a Hoosier boy, there’s nothing like fresh corn you pick up at an Indiana roadside stand, but I am certainly developing a fondness for fresh Florida corn as well. I think it’s a little sweeter, but Indiana corn has more depth of flavor). And with the obvious lime flavor running through the meal, an ice-cold Corona is the only thing that made sense. Just like the right wine selection, it enhanced the flavors and pulled the meal together.

I made enough for leftovers – and let me tell you, both dishes were even better after they’d had a chance to sit overnight. (I always think it’s strange how some leftovers can taste even better than the fresh dish.)

Regardless of where the inspiration came from, I’m just glad that this new dish is around. Don is already hitting me up to make it again. That’s always a good sign.

Chipotle Poached Shrimp Tacos

Scott Duncan, ©2011
A quick and simple twist to seafood tacos that makes it perfect for a weeknight meal.
Prep Time 10 mins
Cook Time 20 mins
Total Time 30 mins
Course Entree
Cuisine Mexican
Servings 4 servings

Ingredients
  

  • 1 T unsalted butter
  • 1 clove garlic minced
  • 1 canned chipotle pepper minced (with about 1 T of adobo sauce)
  • ¼ C chopped parsley divided
  • Juice of 2 limes
  • 1 lb. fresh shrimp peeled and deveined
  • Salt & pepper to taste
  • 4 flour tortillas
  • ½ C Shredded cabbage
  • ½ C sour cream if desired
  • ½ C shredded Monterey Jack cheese is desired

Instructions
 

  • Preheat a large sauté pan over medium high heat.
  • Add butter, garlic, chipotle and adobo. Sauté until fragrant, about 2 minutes.
  • Add lime juice and 3 T chopped parsley. Bring to a simmer.
  • Add shrimp, cover, and simmer for 3 to 4 minutes, until shrimp are opaque, but not quite cooked through.
  • Remove shrimp and reserve.
  • Reduce remaining liquid by two-thirds, until thick.
  • Turn off the heat.
  • Return shrimp to pan and add remaining 1 T of chopped parsley.
  • Stir until shrimp are coated with sauce.
  • Salt and pepper to taste.
  • Warm flour tortillas and add ¼ of shrimp mixture to each tortilla and top with shredded cabbage.
  • Add sour cream and cheese, if desired.

this post is reblogged from my earlier site, Inexpensive Eating.

5 Tricks For Your Tiny Bathroom

5 Tricks For Your Tiny Bathroom

It’s a 50’s holdover that is common to almost every home in America: a tiny bathroom with a tub/shower, toilet, and vanity all crammed in one small space. Back then, the average home had one bathroom that measured 5 feet by 8 feet. Even though most homes built today have 2 (or more) bathrooms, you can still find those minimal measurements in at least one of the bathrooms.

Well, fear not – you can make these rooms at least FEEL larger than they do right now without adding on to either the house or the remodeling budget. Here are 5 tricks I’ve picked up along the way to maximize those itty-bitty bathrooms.

1. Go Big

Go Big

Conventional wisdom is to use smaller tiles in smaller spaces. Not so! Small tiles require more grout lines, and more grout lines can make a small space look busy and tight. Consider using tiles that are at least 18″ square. 20″ or 24″ could be even better. Don’t like square tiles? A variety of options are available in 12″x24″ as well.

One step further is to use tiles with a rectified edge. These tiles can be mounted much closer together and grout lines can look as thin as pencil marks.

2. Focus In

Focus In

One of the most common mistakes in small spaces is trying to do too much. More is not necessarily better in these instances. It’s best to pick one item that you would like to make the focal point of the room. It can be a mirror, a tile accent, a light fixture or even the countertop. Make that one thing pop and let the rest be background.
Negative Space

And don’t forget the impact that negative space can make. Sometimes not putting anything on the walls is the best solution – it’s surprising how loud a statement that ‘nothing’ can make.

3. Be Transparent

Be Transparent

In a small bathroom, you want to be able to see as much of the room as possible. The easiest way to see more is to ditch the shower curtain and add a glass enclosure. Clear glass will give you the maximum effect, but not everyone likes to be that exposed in the shower. Obscure glass adds to the visual space, but not as much as clear. If your bathroom is setup in such a way that you see the tub/shower in front of you as you walk in the room, then combine Trick #2 and Trick #3: create a tile accent in the shower as your focal point and make sure everyone can see it by using a clear glass enclosure.

4. Light ‘Em Up

Light em Up

I don’t care how big or small a particular room is – proper lighting is a must. Even in a small bathroom, 2 light sources are a minimum, and it need to come from 2 different directions. A simple solution for small bathrooms is to add wall-mounted lighting over the vanity, then recessed lighting for the tub/shower space.

5. Pull It Together

5 Tricks For Your Tiny Bathroom

I like bold contrast, but it’s tricky in a small space. Beyond your chosen focal point, consider coordinating various tones of the same color family.

Bonus Trick

If you do choose to go bold, here’s a Bonus Trick: your brain perceives horizontal finishes first, so make the horizontal surfaces as light as possible (the floors and the countertops); choose darker tones for the vertical surfaces (cabinets and accessories are a good choice, even a bold paint color on the wall can work). Your brain will perceive a lighter and larger room.

Spring on a Fork: Pea Pesto Ravioli

Spring on a Fork: Pea Pesto Ravioli

Few things taste like springtime more than sweet baby peas and mint. In fact, that is one of my all-time favorite flavor combinations. The winter months have felt exceptionally long for some reason, and this dish just tastes like Spring on a fork to me.

I know not everyone is going to take the time to make their own pasta dough and roll it out for ravioli (although with the stand mixer attachment, it is incredibly simple). In case you aren’t that adventurous but would still like to try these magnificent creations, you can pick up a package of fresh wonton wrappers from the supermarket instead (my local Publix keeps them in the produce department). The filling takes about 2 minutes to bring together. If you use the supermarket shortcut, it becomes a weeknight meal that is worth serving to company.

The ravioli filling is so light that a heavy sauce would just overpower it. I stick with a simple lemon-infused butter, which takes no more time than heating the pasta water. Add a little grated parmesan, some crusty bread, a salad – and dinner is done in about 30 minutes. To make it even easier, you can assemble the ravioli on a weekend, freeze them, and dinner can be done in no more than 10 minutes – how’s that for fast?

So if you need a little pick-me-up after a long, hard winter, then these little emerald bundles are just the ticket.


Pea Pesto Ravioli

Scott Duncan, ©2015
Use this quick and simple recipe to get rid of the winter blues by adding some green to your plate.
Prep Time 1 hr 30 mins
Cook Time 10 mins
Total Time 1 hr 40 mins
Course Entree
Cuisine Italian
Servings 4

Ingredients
  

Pasta Dough

  • 2 C all purpose flour
  • 2 eggs
  • 2 T olive oil
  • 2-3 T water
  • pinch of salt
  • You can substitute prepackaged wonton wrappers if you do not wish to make your own dough. You will need a total of 96 wonton wrappers

Filling

  • 1 1/2 C frozen baby peas thawed
  • 1/2 C marscarpone cheese
  • 1 garlic clove rough chopped
  • 12-15 mint leaves
  • salt & pepper to taste

Sauce

  • 8 T unsalted butter
  • zest of 1 lemon
  • 1 C frozen baby peas thawed
  • 1/2 t salt
  • 1/4 t freshly ground black pepper
  • grated parmesan cheese optional

Instructions
 

Pasta Dough

  • In a large mixing bowl, combine flour, eggs, olive oil, and salt.
  • Mix until combined.
  • Add enough water to pull the dough together.
  • Continue kneading for 3 minutes.
  • Form dough into a ball, cover with plastic wrap, and let stand on counter for 1 hour before rolling.

Filling

  • Add 1 1/2C thawed baby peas, marscarpone cheese, chopped garlic, and mint leaves to the bowl of a food processor.
  • Pulse into combined and relatively smooth, 6 or 8 pulses.
  • Transfer into a small mixing bowl and cover until needed.

To Assemble Ravioli

  • Working on a lightly floured surface, cut ball of pasta dough into 4 equal pieces.
  • Work with one piece at a time, keeping the remainder covered.
  • Follow manufacturer's instructions to pass dough through pasta roller until you reach thickness level 6. Rolled dough should be approximately 4" x 36".
  • Lay dough horizontally in front of you.
  • Using 1/4 of the mixture, place 1t of filling at a time about 1" up from the bottom edge, and 1" from the left edge.
  • Moving right, repeat this process, spacing the filling about 3" apart, until you have 12 filling mounds.
  • Use a pastry brush to brush the visible dough around the filling with water, which acts as a sealer.
  • Fold the top half of the moistened dough over the filling, meeting the top edge with the bottom edge.
  • Use your fingers to carefully seal all around the filling mounds, making sure to remove any air pockets along the way.
  • Use a knife to cut the ravioli into 12 pieces.
  • (Note: if you are using wonton wrappers instead, place 1t of filling in the middle of 1 wrapper, brush the edges with water, and place a second wrapper on top, sealing the edges, and eliminating any air bubbles.)
  • Move the ravioli pieces to a floured baking sheet, arranging in a single layer, and cover with a towel.
  • Repeat with the remainder of the dough and filling until you have 48 ravioli.
  • At this point, the ravioli can be frozen on the baking sheets, gathered into a freezer bag, and stored for later use.

To Cook

  • Fill a large pasta pot with salted water and begin to heat on the cooktop over medium-high heat.
  • At the same time, place a large pan on a separate burner over low heat.
  • In the cool pan, add lemon zest and butter. The lemon zest will infuse the butter as the pasta water comes to a boil.
  • When the pasta water comes to a boil, reduce to a simmer, and place approximately 12 ravioli into the simmering water.
  • Once the ravioli float to the top, continue to cook for 3 more minutes.
  • Gently drain the ravioli and transfer to the pan with butter sauce.
  • Toss gently.
  • Repeat with the remainder of the ravioli.
  • Once all the ravioli are in the butter sauce, add 1 C thawed frozen peas, and gently toss.
  • Serve with grated parmesan cheese, if desired.


Clean and Contemporary on the Braden River

Clean and Contemporary on the Braden River

Maple Tempo 1Cramped, separate, and traditional are not three words these Bradenton homeowners wanted to use to describe their kitchen. Unfortunately, those are the first words that came to mind when someone walked into the room. That’s why they called us.

What good is a river view if you can’t enjoy it? Opening up the kitchen created a great room out of what was once two small spaces. In turn, the living room picture window brings more natural light into the kitchen.


Maple Tempo 5Having lived with dark and rustic cabinetry for so long, these clients chose StarMark Cabinetry’s Tempo slab door style to achieve a sleek look. A honey maple finish makes ensures the visual warmth remains in the kitchen while enhancing the look of sleek stainless steel, Jenn-Air appliances. Giallo Rio granite, with its caramel tones and black accent ties the cabinetry and appliances together.

Maple Tempo 4A hood wasn’t important to the homeowners, so placing a cooktop on the peninsula meant we didn’t have to sacrifice the newfound open feel. (While local building codes do not require mechanical ventilation as long as an operating window is available, I always think it is a good idea. This is one instance where the homeowners’ wishes trumped my suggestion.)

Pantries remedy the storage shortage that occurs when eliminating wall cabinets. Flanking the refrigerator with split pantries also provides a more aesthetically-pleasing alcove to house the appliance, mimicking the adjacent built-in oven and microwave. A small  island bridges the large floor space between storage, prep, and primary cooking zones. Finally, a little bit of glass creates a natural focal point from the living area, while stem glass racks below form an entertainment zone at the same time.Maple Tempo 3


Cabinetry: StarMark Cabinetry
Doorstyle: Tempo
Wood Specie: Maple
Finish: Honey
Countertops: Giallo Rio granite
Remodeling Partners:Fred H. Bey, Inc.; Rice’s Appliances


the ‘befores’…

Before 1Before 2

Before 3Before 4

What to Do With All the Eggs: Gorgonzola Egg Spread

What to Do With All the Eggs: Gorgonzola Egg Spread

It happens every year. Eggs coming out of your ears because of that silly rabbit and his penchant for multi-colored mystery. What do you do with them all? There are only so many deviled eggs that one person can eat, and egg salad really loses its appeal after 2 or 3 days. Here’s a quick and easy after-Easter recipe to make use of all those hard-boiled beauties. Once the eggs are cooked, it only takes about 5 minutes to put together – and it tastes so good.

Serve it with the pita sticks or serve it with crackers. Hell, it even makes a great alternative to egg salad for sandwiches. Just make it. Trust me…


Gorgonzola Egg Spread with Pita Sticks

Scott Duncan, ©2010
A quick and easy way to get rid of all those leftover Easter eggs, a simple appetizer, or a great sandwich spread
Prep Time 5 mins
Cook Time 15 mins
Total Time 20 mins
Course Appetiser
Servings 4 -6 for appetizers

Ingredients
  

  • 3 hard boiled eggs
  • 2 t Dijon mustard
  • ½ t hot sauce
  • 2 oz. crumbled gorgonzola cheese
  • 3 T mayonnaise
  • 6 pcs. Pita bread
  • 3 T olive oil
  • Salt & pepper to taste

Instructions
 

Pita Sticks

  • Preheat oven to 450 degrees.
  • Slice pita into 1” sticks.
  • Toss with olive oil, salt, and pepper.
  • Spread pita sticks on baking sheet in a single layer.
  • Bake approximately 15 minutes, until pita is crisp.

Gorgonzola Egg Spread

  • In the bowl of a food processor, combine eggs, Dijon, hot sauce, gorgonzola, mayonnaise, salt & pepper.
  • Pulse until smooth.
  • Spoon into serving bowl and serve along side pita sticks.


Countertops: Granite vs Quartz

Countertops: Granite vs Quartz

Cambria Praa Sands Quartz

Cambria Praa Sands Quartz

Natural stone is comprised of many different materials. The most common for kitchen countertops are granite. Names like Uba Tuba, Giallo Veneziano, Blue Pearl, Black Galaxy are just a few of the many colors available in granite. Quartz composites is also sometimes referred to as engineered stone, and is exactly that: engineered stone. Common brands of quartz composites are Cambria, Caesarstone, Pompeii, Silestone, Viatera, and Zodiaq, though there are plenty more. What’s the difference, you ask? I’m here to tell you.

Composition

Granite is composed of many different minerals, but the majority of most granites consist of quartz and feldspar.  Quartz is one of the hardest minerals known – and feldspar isn’t too far behind. In fact you have to have something equally hard (or harder) to scratch or cut it. In everyday life, those things are diamonds, rubies, sapphires, emeralds, and topaz. In short, either is pretty durable. I usually tell people that you actually have to be pretty mad or pretty unlucky to do some damage to a granite or quartz composite countertop. But it’s not a bad excuse, huh? “Please ignore the scratch in the counter. I never realized it could happen because of my diamond, ruby, and sapphire ring“.

Golden Beach Granite

Golden Beach Granite

Getting the Slabs

Like any stone, both options are first quarried out of the ground. Granite is pulled out in enormous cubes, then sliced like a loaf of bread to create the slabs used in countertops (Keep that sliced bread concept in mind for a little later). It is 100% natural materials retrieved out of the ground.

For quartz composites, the quartz is separated from the other minerals and crushed (or crushed, then separated. I’m not really sure which). That crushed quartz is laid out and combined with some artificial elements to create the slab. The slab consists of 93% quartz, with the other 7% being resins, coloring agents, etc. The most simplistic way to explain the production is to say that the resin is super-heated, melts, then cools into a nonporous product that, scratch-wise, is just as homeowner-friendly as granite.

Appearance

Technically, there is no ‘pattern’ to granite. Two slabs of the same type of granite can look vastly different. The look of the stone was created from the amount of volcanic activity when the earth’s crust was molten and moving. In fact, the linear effects found in some granites is referred to as ‘the movement’ of the stone. It is what can give some granites a unique or breathtaking look (it’s ‘ooo and aaahh factor’ as I call it). That volcanic movement also means that granite out of the same quarry can vary greatly in appearance when it is cut. What happens when a kitchen needs more than one slab of granite to complete the counters? That’s where the sliced bread comes in.

Granite movement - caused by volcanic activity eons ago

Granite movement – caused by volcanic activity eons ago

Have you ever made a sandwich with an irregular loaf of bread? It takes a second’s worth of thought to make sure the two slices line up properly so top and bottom slice can look somewhat even all the way around.  That means you really need two pieces of bread that are next to each other in the loaf, and they need to be oriented in a particular way to make it work. Same holds true for granite. Each quarried cube is given a lot number (the loaf, if you will). Then as it is sliced, each slice is given a sequence number. If you need two pieces of granite to work together, you will have better luck using sequential pieces (say pieces 7 and 8) than you will using non-sequential pieces (like pieces 2 and 5).

In the case of quartz composite, they started out with a very uniform look or pattern. As technology has progressed, the manufacturers have begun creating random and free flowing options which more closely mimic natural stone. Sometimes lot numbers are important and sometimes they are not, it depends on the brand and finish you are selecting. But the trend in quartz composite is definitely moving away from a patterned look and towards a more organic appearance.

Sealing and Maintenance

Quartz composite is the easy one. Due to the nature of its manufacturing process, quartz composite is nonporous. Therefore it never needs to be sealed. In fact, a couple of particular brands have been approved for installation in medical settings.

Since granite is a completely natural material, it contains voids and micro-fissures throughout. For this reason, natural stone needs to be sealed periodically. At installation a standard sealer is applied. Most standard sealers will last in the neighborhood of 12 months. After that, spills and stains can happen (see my hints on getting out granite stains). Resealing is similar to waxing a car – there are pastes and liquids; you can do it yourself or hire someone to come in to do it for you. But there is an alternative: an upgrade sealer can be purchased through most stone fabricators that carries a 15-year warranty, although the 15-year sealer is not advisable on all granites, especially darker tones. Personally, I think the 15-year sealer is a good option.

Green River Granite

Green River Granite

Price Comparisons

Most granite suppliers break down the pricing of granite colors into 4-6 standard categories before getting into what is called exotic colors. Exotic is exactly what it sounds like. Some of these can be reasonably priced, and the cost of some can make your eyes bulge. For the most part, granite pricing is based on how common the particular color is, and is not necessarily indicative of a difference in quality (but as in everything, there are exceptions). The less expensive granites are available from quarries on several continents and have similar looks. Exotics are generally available from fewer sources, thus increasing their cost.

Quartz composite’s pricing structure will vary from brand to brand. Cambria uses a single price point for everything in their line. Others can have 5 or 6 price levels, depending on color, particulate size, and pattern. What’s the difference from Brand A to Brand B? Honestly, it’s the difference between Coke and Pepsi. One brand may have a particular look or series that isn’t available elsewhere, but quality is uniform regardless of manufacturer.

Warranties

Since granite is a natural material, you generally won’t get warranties against cracks etc. Some fabricators will add a 1-year warranty to cover fabrication issues – seams, etc., but the material is seldom covered.

Quartz composites are different. Most brands carry a warranty of 10 years to a lifetime to cover manufacturing defects. How important is the warranty? To put it into context: in over 25 years of designing projects for clients, I have had 1 instance where a stone product failed. It was quartz composite and was covered under warranty.

So which one is best for you? Do you like the oo and ah of granite – or do you like the fact that quartz composite doesn’t need to be sealed? Those are usually the deciding questions.

Cambria Lancaster Quartz

Cambria Lancaster Quartz

Easter Embarrassment: 3 Easy Candy Recipes

Easter Embarrassment: 3 Easy Candy Recipes

Isn’t it funny how the most mortifying moments of your life are some of the most vivid images your memory conjures? I haven’t been able to pick up Easter candy for the last 40 years without recalling one of the earliest times I embarrassed the heck out of myself (I wish I could say it was the last time I did it. Unfortunately, there have been many opportunities since then to top myself). I was young (really young) – and it was the first time I got to go into a store by myself.

White Chocolate Cherries

White Chocolate Cherries

I was visiting my grandparents, and we were out and about one afternoon. I’m not sure of the sequence of events that led up to it, but my grandfather gave me some money and let me go into the candy store by myself to buy something for not only me, but my two younger brothers as well.

I can remember being very proud of myself because I spent quite a bit of time browsing everything and giving careful thought to what Matt and J.J. would each like (as most of you with siblings are aware, thinking about what they’d like isn’t always high on a kid’s priority list). Grown up enough to go to the store alone and so unselfish – I was sure everyone was going to fawn all over me. I took my selections to the counter, and then the embarrassing light of reality was shone straight in my eyes.

The woman rang up my purchase and I handed her my money. I guess at this point I should tell you that it was right before Easter, and I had taken great care in selecting not one but three very large, filled Easter baskets – complete with candy, toys, cellophane wrapping, and a big bow. What I gave her was three quarters. Yes, bargain shopper that I am, I was trying to by (I’m guessing) ten or fifteen dollars worth of merchandise with seventy-five cents. The woman very kindly explained to me that I didn’t have quite enough money and offered options that were in my price range. What I left with was three packages of marshmallow peeps. I was so dejected – my basket had a pistol and holster in it, for crying out loud. I slunk out of the store and back to my grandparents, red-faced and defeated.

Chocolate Peanut Butter Eggs

Chocolate Peanut Butter Eggs

Every year when the holiday rolls around, I think about this story every time I buy Easter candy. You know, I still refuse to buy those cellophane wrapped baskets, and I cannot stand marshmallow peeps, even now.

Of course, I think a lot of people have stories like this. I also think this is why I always have a running total in my head whenever I shop for anything – I don’t ever want to have to settle for a three-pack of peeps again.

To escape the possibility of being humiliated this year, I decided to make my own candy for Easter. Of course, the problem is that I cannot stand fussy detail when I cook. To get around that, I came up with three ideas that are simple to execute but still have a little bit of bang. Besides, telling someone you made candy always elicits amazement.

For the most part, I don’t even think you can call these recipes ‘cooking’. It is basically melting chocolate and dipping stuff into it. I don’t think Jacques Torres has much to worry about from me.

Don can’t stand white chocolate, so I thought I’d be safe dipping candied cherries in it (I’ve let go of a little of that unselfishness since the incident at the candy store – life lessons will do that to you). Of course, it turns out that the white chocolate cherries were his favorites of the three – I ended up having to hide them in order to preserve them for the holiday.

Toasted Almond Clusters

Toasted Almond Clusters

The only trouble I came across was the peanut butter filling for the eggs. I didn’t want to put anything in the mix that would cause the filling to be stiff, so getting the pliable peanut butter eggs in and out of the melted chocolate proved to be a tad nerve-wracking. But just like everything else, I tell people that they’re ‘rustic’. Honestly, I spend all week being anal retentive as I manage installation projects – the last thing I want to do on the weekend is worry about making things perfectly identical. If you don’t like the rustic look, then, by all means, fuss to your heart’s content.

I also like different varieties of chocolate combined with different things. The toasted almonds work great with bittersweet chocolate, and it is a nice contrast to the super-sweet cherries and white chocolate.

All in all, I think it took a little over an hour to concoct all three confections. Not much trouble at all to escape more Easter embarrassment.


Chocolate Peanut Butter Easter Eggs

Scott Duncan, ©2011
They can be pretty scarce around the holidays, so why not make your own?
Course Dessert
Cuisine Candy

Ingredients
  

  • 2 C peanut butter creamy or chunky
  • ½ C powdered sugar
  • 11 oz milk chocolate chips
  • 2 oz bittersweet chocolate chips optional

Instructions
 

  • Combine peanut butter and powdered sugar in a mixing bowl until smooth.
  • Place in refrigerator for 30 minutes to cool.
  • Once cooled, Take 2T of peanut butter mixture and form into egg shape.
  • Place peanut butter egg onto baking sheet lined with wax paper and press until uniform thickness (about 3/8”) while maintaining egg shape.
  • Place peanut butter mixture in freezer for 30 minutes or until set (they will still be pliable).
  • Place milk chocolate in a microwave safe bowl.
  • Microwave on half-power for 20 seconds at a time.
  • After each 20 second interval, stir the chocolate.
  • Continue until all the chocolate is melted (being careful not to scorch the chocolate).
  • Dip each peanut butter egg into the melted milk chocolate (one at a time), using two spoons.
  • Return dipped peanut butter to wax paper-lined baking sheet.
  • Once all eggs are dipped, return to refrigerator until milk chocolate sets.
  • If desired, add 2oz of bittersweet chocolate into a small, microwave-safe bowl and melt using same method as before.
  • Drizzle over milk chocolate covered eggs and return to fridge until set.
  • Store in an airtight container in a cool place.
  • Makes 16 eggs.


Toasted Almond Chocolate Clusters
 
An easy gift that the kids can help with.
Author:
Recipe type: Dessert
Cuisine: Candy
Ingredients
  • 10oz raw almonds
  • 12 oz bittersweet chocolate chips
Instructions
  1. Preheat oven to 400.
  2. Place almonds on a baking sheet in a single layer.
  3. Roast for 6-9 minutes, until almonds are slightly toasted, being careful not to burn them.
  4. Remove almonds from baking sheet and allow to come to room temperature.
  5. Place bittersweet chocolate in a microwave safe bowl.
  6. Microwave on half-power for 20 seconds at a time.
  7. After each 20 second interval, stir the chocolate.
  8. Continue until all the chocolate is melted (being careful not to scorch the chocolate).
  9. Pour toasted almonds into the melted chocolate and toss until almonds are thoroughly coated.
  10. With a spoon place a cluster of 3 almonds at a time onto a wax paper-lined baking sheet.
  11. Once almond clusters are finished, place baking sheet in refrigerator until chocolate sets.
  12. Makes about 6 dozen clusters.


White Chocolate Cherries

Scott Duncan, ©2011
Ridiculously easy to make for something so ridiculously good.
Course Dessert
Cuisine Candy

Ingredients
  

  • 16 oz jar maraschino cherries
  • 11 oz white chocolate chips
  • 2 oz bittersweet chocolate optional

Instructions
 

  • Drain maraschino cherries and place on paper towels. Pat dry (if there is any moisture, it could keep the chocolate from adhering, or it could make the chocolate seize up).
  • Place white chocolate in a microwave safe bowl.
  • Microwave on half-power for 20 seconds at a time.
  • After each 20 second interval, stir the chocolate.
  • Continue until all the chocolate is melted (being careful not to scorch the chocolate).
  • Dip each cherry into the melted white chocolate (one at a time), using a fork.
  • Place dipped cherries onto a wax paper-lined baking sheet.
  • Once all cherries are dipped, place baking sheet in refrigerator until chocolate sets.
  • If desired, add 2oz of bittersweet chocolate into a small, microwave-safe bowl and melt using same method as before.
  • Drizzle over chocolate covered cherries and return to fridge until set.
  • Makes about 4 dozen


Transitional Warmth for the Kitchen and Bath

Transitional Warmth for the Kitchen and Bath

Open KitchenWhen this client purchased her Perico Island condo, she knew it needed some work. Not only was the 1980’s look well passed time for an update, the new owner wanted a design to fit her lifestyle, and had a desire to impart a unique personality to her new home.

The dropped, domed ceiling was eliminated and mirrored walls were opened up to create the illusion of more space. With storage at a premium, cabinets were expanded to the new ceiling line, creating ample storage for the items she brought from Michigan. A water heater closet was re-imagined,  and now the appliance shares its home with additional pantry storage.

One thing this client knew from the start was that she required a large desk area with plenty of negative wall space to display her favorite framed artwork, making it a focal point of the light and cheery work corner.Ample Corner Work Area

Selecting StarMark Maple Cabinetry allowed this client to marry the traditional warmth of their Oregano stain with the straightforward lines of their Stratford door style, thus anchoring the kitchen in both the traditional and the contemporary. One of the beauties of StarMark Cabinetry is the ability to customize door styles without customizing the price: an optional door profile and slab drawer fronts didn’t cost an extra cent but married right-angled simplicity to the warm wood hues.

Neptune Bordeaux Granite Is The Focal PointUnderstanding the granite counters would be the primary focal point sent us on a scavenger hunt. She wanted: A) Movement but not too much; B) Some color but mostly neutral; C) Cohesiveness with the cabinetry stain. Luckily, a couple of trips was all it took to settle on Neptune Bordeaux – a neutral background with linear movement and just a hint of wine tones. The ability to look at the slab layout before cutting ensured the most eye-catching segment of granite became the center of the counter-height bar top that straddles both the kitchen and the living room. And just to avoid the expected, a bullnose edge softens the counter tops when compared to the rectangular cabinet fronts and is a perfect complement to the arched stainless steel handles that adorn each door and drawer front.

StarMark Stratford Door StyleStainless steel pulls were selected to blend with the suite of Bosch appliances that were purchased from Rice’s Appliances in Bradenton.

A grey-toned blue paint on the walls adds a subdued burst of color that doesn’t require a lifetime commitment. The neutral tones of the cabinets, counters and tile floors ensures a full range of suitable colors are still available should she grow tired of the blue.

Guest Bath Focal PointAlmost all of these finishes were copied in the Guest Bath, with the exception of the blue latex. With a goal to give the Guest Bath its own vibe, a toasted beige covers the walls. This allows the color to pop off of the custom shower curtain the homeowner picked up in her travels. The blue is still well-represented there and is augmented by the thread of blue glass tile running through the shower and above the vanity.Guest Bath Vanity


Cabinetry: StarMark Cabinetry
Doorstyle: Stratford with optional ‘L’ edge
Wood Specie: Maple
Finish: Oregano
Countertops: Neptune Bordeaux granite
Remodeling Partners: Fred H. Bey, Inc.; Rice’s Appliances
 
Before Kitchen 1

Before Kitchen 1

Before Kitchen 2

Before Kitchen 2

Before Bathroom

Before Bathroom

Kitchen Remodeling Tips When Selling Your Home Soon

Kitchen Remodeling Tips When Selling Your Home Soon

It’s a question I get asked all the time, “How much should I worry about resale value while I’m remodeling my kitchen?” The truth is, there isn’t a single right answer for everyone. How long do you plan to live there? How extensive are your remodeling plans? Are your lifestyle needs different than the average homeowner? How important is the return on your remodeling investment?

If you were to narrow it down to one question, I think the most important has to do with the length of time you intend to own the home. For my clients, I break it down to 3 time frames: Sell It Soon (< 2 years); Sell It In a Little While (3-7 years); Sell It Later (7 years +).

If you’re planning on putting your home on the market within the next 2 years, then return on investment should be near the top of your remodeling priorities. If sold within 2 years, a homeowner should expect to realize between a 76%-83% return on investment for the Tampa Bay Market (Remodeling Magazine 2014 Cost vs. Value Report). To help you get the most bang for your buck, here are some tips:

Determine Your Target Market

Does your neighborhood cater to the young and hip or is it a more established and traditional area? Either way, you want to adjust your design style accordingly.

Neutral Color PalletteFocus on Aesthetics

Go for the most visual bang for your buck. If your budget doesn’t allow for both the all-wood cabinet and the fancy doorstyle, opt for the fancy doorstyle. Remember, looks count. Longevity doesn’t.

Code Beige

Even though you might be turned on by bold uses of color, homebuyers generally aren’t. Skip the color wheel and opt for light wood tones and neutral finishes (most homebuyers visualize better with a blank canvas).

Skip the Extras

His and Hers warming drawers, motorized spice racks, and built-in espresso machines might be just what you always wanted in your dream kitchen. But when it comes to resale value, you’ve just thrown a lot of money out the window. Stick with the basics – pick an appliance line that’s appropriate for your home (too entry-level can turn off a discriminating buyer; too luxurious is a waste of investment) and stick to the basic models. When in doubt, pick the stainless steel finish in a less-expensive line. For storage conveniences – no more than a couple well-placed roll out trays and a lazy susan in the corner.

Minimize Structural Changes

Nothing eats up a kitchen budget faster than moving walls and all the mechanics that go with it. Don’t try to make all the design changes that have bugged you while you lived there. You’re not trying to solve your problems, you’re trying to sell your home. If you aren’t sure, ask a design professional if a structural change is a wise idea.

Grey Color TrendsFollow the Trends

If you’re selling your home soon, it pays to follow the latest styles. Right now, simplistic is in – simple lines, warm tones, stone countertops, stainless steel appliances. The more current the kitchen looks, the more attractive it will be to potential buyers. the hottest colors for the next few years? Greys.

Proper Lighting is a Must!

Lighting is so often an afterthought, but it needs to be a priority for resale. A good lighting design can change the whole demeanor of a small kitchen. Plan it from the beginning.

Design with Negative SpaceFocus on the Negative

If your kitchen seems small, consider reducing the amount of cabinetry you have. Creating a focal point with negative space is not only visually pleasing, but it will cut down on your budget by reducing the amount of cabinetry you require.

If you follow these basic rules, you should end up with a kitchen that potential buyers love – at a price that won’t break your bank!


Unique and Bold: An Updated Twist on a Mid-Century Look

Unique and Bold: An Updated Twist on a Mid-Century Look

Buying a riverfront condo in Palmetto gave a recent client the perfect excuse to revive a style she had long admired – and she had definite ideas for the final look.

Big Chill AppliancesBefore she even found me, she had purchased a suite of appliances that look as if they were plucked right out of June Cleaver’s kitchen. Big Chill Appliances have a vintage look that conceals the most current technology. The client’s choice of Buttercup Yellow became the focus of all other selections. Her desire to have that creamy warmth jump off the wall led to selecting finishes  in 2 complimentary gray tones from Starmark Cabinets: Pearl for the upper cabinets and Peppercorn for the bases, creating a neutral backdrop to highlight the intended focal point. It’s as if Ted turner began colorizing a black and white rerun, but stopped after the appliances were finished.

Finding a countertop to tie these colors together was the biggest challenge – and the last selection made. Two different gray finishes, white tile, and yellow appliances created some obstacles. Many, many choices were considered and then discarded. Finally, we literally stumbled across Super White granite. It was the perfect thing to make a cohesive space and not detract one little bit from the appliances.

Opening up the SpaceBeing a condo, the kitchen was compact and closed off. Eliminating the breakfast area, a pantry, and coat closet (“Who wears coats in Florida anyway?”) allowed a dramatic transformation of space and ergonomic function. The result was an open floorplan that defies the mid-century norm which saw kitchens isolated from the rest of the living area. “I want everyone to see these appliances,” was her response.

To make up for the loss of a pantry, storage accessories lurk behind every cabinet door, making efficient use of all available areas. Full corner access, roll out trays, soft-opening trash storage, pan drawers, and even a lid rack put every item at her fingertips. We further decided to thumb our nose at a strict mid-century interpretation by adding stainless steel panels in place of glass doors in a few cabinets.

The one drawback was the cooking appliance. Since Big Chill only manufactures gas ranges and this project was in an all-electric high rise, a compromise had to be struck. The solution was a separate oven in retro, buttery yellow and a modern induction cooktop. (One change I would have made – a hood for the cooktop.) The client was adamant about eliminating a vent system that she would never use. Since building codes didn’t require it for this situation, the client got her wish. In its place, a large section of yellow glass block was added in the field of white subway tile on the longest wall of the room.Kitchen 3

This room wasn’t designed to appeal to everyone. It is as unique and bold as the client who occupies it.

Cabinetry: StarMark Cabinetry
Doorstyle: Monroe
Wood Specie: Maple
Finish: Peppercorn Tinted Varnish (base); Pearl Tinted Varnish (upper)
Countertops: Super White quartzite
Remodeling Partners: Fred H. Bey, Inc.


Out of the Roasting Pan: Grilled Leg of Lamb with Herb Pesto

Out of the Roasting Pan: Grilled Leg of Lamb with Herb Pesto


I don’t understand how Easter is upon us already. I am still working on the To-Do List I made over the Christmas holiday (OK, I haven’t even started it). I use to roll my eyes when my father said, “The older you get, the faster time goes.” I totally get it now.

Of course, I always like when holidays roll around. Gives me a chance to do a big dinner with all the trimmings and invite  people over. But holidays are about the only time when two ovens just don’t seem to be enough, and using only one oven can be downright maddening. Luckily, in Florida I have the opportunity to roll out the grill and free up some much-coveted oven space on these big cooking days.

I decided to grill this on a whim a few years ago, and now it has become our standard Easter fare. I cannot believe how much easier it is to properly time getting side dishes and dessert in and out of the oven when you don’t have a big honking roast taking up most of the space in there.

Another bonus is the fact that all the prep work is done the day before. I’m big on planning ahead for big cooking holidays – I usually have the entire week mapped out with day-by-day cooking tasks (this will come as no surprise to the people in my life who already know I’m completely anal retentive), so this works out great for me. It’s important to let the lamb marinate in the herb pesto for a significant amount of time to let all of the flavors penetrate the meat. On Easter Sunday, once we get home from church, I just have to heat the grill and let it do the work.

And just a couple of quick grilling tips: I use a gas grill with 4 different burner zones, so I can turn off the middle burners and still have heat coming from both sides of the meat. If you do not have a setup like this and heat will only penetrate the left or right of the lamb, you will probably want to rotate the meat after 15 or 20 minutes on each side so the whole roast can have the opportunity to cook evenly. If you use a charcoal grill, simply mound up the briquets on one side, creating a hot side and a cool side for indirect cooking. And trust me on this, lamb contains so much fat that cooking over a direct flame is a sure way to end up with burned lamb (I speak from experience).

Open flames always make meat taste better. And as far as I’m concerned, lamb is one of the best things out there. Grilling a whole leg of lamb? There is nothing better – except maybe a good Argentine Malbec to pair with it. Happy Easter!


Grilled Leg of Lamb with Herb Pesto

Scott Duncan, ©2013
Free up your oven space on the holidays with this springtime crowd pleaser.
Course Entree

Ingredients
  

  • 4-5 lb. boneless leg of lamb
  • 6 garlic cloves
  • 3 sprigs of fresh rosemary
  • 1 T fresh thyme leaves
  • 1/4 C fresh mint leaves
  • 4 scallions
  • 1/2 C fresh parsley leaves
  • 1 lemon zested and juiced
  • 1 T kosher salt
  • 1 t ground black pepper
  • 1/3 C olive oil

Instructions
 

The Night Before

  • Rough chop garlic cloves, fresh herbs, and scallions, then add to bowl of food processor, along with lemon zest, lemon juice, salt, and black pepper. Pulse until finely chopped.
  • With processor running, drizzle in olive oil.
  • Pour pesto into a bowl and set aside.
  • Lay out leg of lamb, and spread open to a single layer. Use paper towels to pat dry.
  • Trim any excess fat.
  • Apply an even coating of pesto to all surfaces of the lamb.
  • Fold lamb back up, place in a large pan, and cover with plastic wrap.
  • Refrigerate for a minimum of 2 hours and up to overnight.

The Day Of

  • Remove lamb from refrigerator and let rest on counter (still covered and wrapped) for one hour to take the chill off.
  • Preheat all burners of the grill on High for 15 or 20 minutes.
  • The lamb will cook on indirect heat. Just before adding lamb, turn off appropriate burners and turn remaining burners to Low.
  • Open lamb to a single layer and place, fat side up, on the indirect heat.
  • Add probe thermometer to thickest part of the lamb.
  • Grill for 30-40 minutes. Flip.
  • Cook until probe thermometer reads 125 degrees F. (total cooking time should be 75-90 minutes)
  • Remove from grill.
  • Tent loosely with foil and let rest for 20 minutes before carving.
  • Serves 8-10


Light and Lazy: Lemon Broccoli Pasta

Light and Lazy: Lemon Broccoli Pasta

There are days when I drag myself home and have absolutely no desire to cook at all. Most of those nights, the pizza guy comes to our house. Unfortunately, I’ve noticed lately that my waistband is a little more snug than normal (must have shrunk in the wash). So instead of inviting Carl to come visit (yes, I know the pizza delivery guy’s name), I throw this embarrassingly simple dish together.

Seriously. 3 minutes of active work and 20 minutes to the table. The beauty of this is that it’s not only easy – it is also really good. The ingredients are almost always in the fridge, and I don’t have to plan ahead of time. Luckily, the grocery store sells bags of pre-cut broccoli that is washed and ready to use. Beyond crushing a few cloves of garlic and zesting a couple of lemons, the bulk of the prep time is taken up by sitting around, having a glass of wine, and waiting on the pasta water to boil. This is my kind of weeknight cooking!

The sharp, lemony flavor cuts through the buttery sauce and give it a nice balance. The trick is to not overcook the broccoli. A little snap left in the vegetable makes this dish a refreshingly light dinner on a warm night.

Of course, if you want to make a heartier dish, you can add some shrimp to the thing. Just sauté for 5 or 6 minutes before adding the broccoli and pasta to the sauce. In all honesty, I hardly ever make this dish with shrimp added. That would mean a trip to the fish monger, and quite possibly, the extra effort of peeling shrimp. Defeats the whole lazy mindset. If you are that industrious, then have at it – I won’t tell.

So free up some much needed time in your weeknight by whipping up this quick and effortless meal.

Lemon Broccoli Pasta

Scott Duncan, ©2013
Free up some time in your weeknight by whipping up this quick and effortless meal
Prep Time 3 mins
Cook Time 15 mins
Total Time 18 mins
Course Entree
Servings 4

Ingredients
  

  • 1 lb. penne pasta
  • 12 oz. broccoli florets washed and cut
  • 3 T olive oil
  • 3 T butter
  • 4 garlic cloves crushed and finely chopped
  • 1/4 t crushed red pepper flakes
  • 2 lemons zested and juiced
  • 1/4 C grated parmesan cheese
  • lemon slices for garnish if desired

Instructions
 

  • Add pasta to a large pot of boiling, salted water. Cook according to package directions.
  • While still cool, add olive oil, butter, red pepper flakes, and lemon zest to a large sauté pan.
  • Place sauté pan over very low heat, allowing butter to melt and lemon zest to infuse the olive oil mixture.
  • Approximately 4 minutes before pasta is cooked, add broccoli florets to boiling pasta pot. Cook broccoli and pasta together until pasta is al dente.
  • At the same time, increase heat under sauté pan to medium high
  • Add garlic to olive oil and sauté for 2 or 3 minutes.
  • Add lemon juice to finish the sauce.
  • Drain pasta and broccoli, then add to both to the sauce.
  • Remove from heat.
  • Toss with parmesan cheese and lemon slices (if desired).


Creating a Focal Point for a Master Bath

Creating a Focal Point for a Master Bath

The Focal Point of the Space
 

 It’s great when a client has a definite idea about a new space. This recent Sarasota client enjoys the color blue and knew she wanted it prominently featured in her new Master Bath remodel. The bathroom she had been living with since purchasing the house 18 years ago had many different shades of blue – too many. From watery blues to navy, the different colors were competing with each other and just looked like a jumble. The solution – reduce the amount of blue in her new space.

Blue Glass Tile


I asked her to show me the shade of blue she enjoyed most. She pulled out a blown glass bowl with a perfect azure tone. It took some convincing on my part, but she finally realized that if she wanted that blue to be the highlight, we had to make it pop off of the wall. That meant everything else had to be neutral. What’s the easiest neutral? White, of course.

Plenty of Vanity Storage

By positioning a display cabinet facing the entry door and lighting the interior, we were able to make this beautiful piece the central spot of her new master bath. Our Stressless Collection of cabinetry in a crisp Jasmine White paint was paired with Corian Antarctica, a white-on-white surface, for the vanity tops and shower seat create the perfect backdrop for the multi-tone blue glass tiles that highlight both the vanity and the barrier-free shower. Polished chrome fixtures and a whimsical handle give this once dreary small space some much needed pep.

Continuing the Blue Accents

Cabinetry: Stressless Collection
Doorstyle: Simplicity
Wood Specie: Maple
Finish: Jasmine White paint
Countertops: Corian Antarctica
Remodeling Partners: Fred H. Bey, Inc.


…and the ‘Before’ photos

Torta Reform: Mushroom and Rosemary Potato Torta

Torta Reform: Mushroom and Rosemary Potato Torta

Do you have one of those pieces of kitchen equipment that you only use when you have to? For me, it’s a mandolin. It’s difficult to clean, it’s awkward to use, and every time I touch it, I think I’m going to end up with one less finger by the time I’m finished. Of course, the fact that I have a cheap (in the negative sense of the word) mandolin probably has more than a little to do with it. Regardless, I seldom get it out – unless I absolutely have to.

We went to a party this weekend. One of us (not me) ended up having a little too much fun and was paying for it the next day. I hate days like that. I can certainly empathize with anyone who wakes up because they hear the ants crawling outside the bedroom window (I’ve been there once or twice myself). In an effort to combat the remnants of an exciting evening, Don had requested something starchy but light for dinner (yes, he was still not himself by dinner time – he thought it was a really good party).

Starchy but light? I threw out a few ideas, but each one made his face a little darker shade of green. Then he mentioned potatoes. Finally a light went off over my head – potato torta! It’s light with a little crunch on the outside and a creamy center on the inside. Great idea – except for that stupid mandolin. You see, the key to a good torta is thinly and uniformly sliced potatoes. That means dragging out the mandolin. I wasn’t in the mood to fight that thing (plus I’d been at the party the night before as well, and my manual dexterity was a little in question), so I started playing with other options to create the starchy but light. I ended up grating the potatoes instead. I figured that would get me close to the texture I was after.

Whenever I grate potatoes, I always wring out the excess moisture. Try it sometime – you’ll be surprised how much water a potato holds (just use a tea towel that you don’t want to display because the potato starch will leave a nasty stain that doesn’t go away). Besides, potatoes brown up much nicer when you eliminate all that moisture. I also made sure to use a smaller than average pan so I could get a certain level of thickness in the potatoes and create the creamy center I was after.

I gave the potatoes flavor by adding some herbage to the mix before sautéing: garlic, rosemary, and scallions. And because it was going to be dinner, I didn’t want to leave it with just potatoes, so I sautéed some mushrooms first that could be added on top. (Just like potatoes, mushrooms have an excessive amount of water. When I was mushrooms to brown, I avoid adding any salt until they are finished. The salt just pulls out all the water and you end up with stewed mushrooms instead of nicely browned.)

I was about to finish up the dish when I realized that the mushrooms would just roll around without a little glue to hold them in place. Luckily, I had some cheese that would do the job just fine. Besides, when did a little cheese ever hurt anyone?

I paired this with a little bit of green salad, and it turned out to be a fine meal. The mushrooms give it some meatiness that rounds out the crispy/creamy potatoes. There’s just enough flavor from the rosemary to compliment everything, but not overpowering (like rosemary can be).

I think this would also work fantastically as an accompaniment to beef – or better yet, lamb. And the nice thing is that you can change up the flavors to go with any dish you’d like. So go ahead and create your own torta reform.

Mushroom and Rosemary Potato Torta

Scott Duncan, ©2010
The perfect hearty side dish - or a light meal all on its own.
Course Entree, Side Dish

Ingredients
  

  • 8 oz. mushrooms quartered
  • 6 T olive oil divided
  • ¼ t dried thyme
  • 4 medium potatoes peeled and grated
  • 2 cloves garlic minced
  • 1 t dried rosemary
  • 4 scallions diced
  • ½ C shredded Monterey Jack cheese
  • ¼ C chopped parsley
  • Salt & pepper to taste

Instructions
 

  • Preheat 2T olive oil in a 10” nonstick sauté pan over medium high heat.
  • Add mushroom and dried thyme.
  • Sauté 6-8 minutes, stirring occasionally, until mushrooms are browned.
  • Add salt & pepper (to taste) only after the mushrooms are finished.
  • Remove from pan and reserve.
  • While mushrooms are sautéing, place grated potatoes into a tea towel and squeeze all excess water out of potatoes.
  • Transfer potatoes to a mixing bowl and add remaining olive oil, garlic, rosemary, scallions, salt and pepper to taste.
  • Mix to combine.
  • Add potatoes to the same sauté pan after mushrooms are complete.
  • Press lightly down on potatoes to create a uniform thickness.
  • Sauté 6-8 minutes on the first side, until potatoes are browned on bottom.
  • Flip the potatoes (in a single disc).
  • Once the potatoes are cooking on the second side, sprinkle shredded cheese over the top.
  • Add mushrooms and spread evenly across the top.
  • Sauté potatoes 6-8 minutes on second side, until nicely browned on bottom.
  • Remove from pan onto cutting board.
  • Sprinkle top with chopped parsley.
  • Let sit 5 minutes before cutting.

This post was reblogged from my earlier site, Inexpensive Eating.

Join Our E-mail List